A well-loved deck is the heart of outdoor living. It offers a serene space for relaxation and gatherings until the seasons shift. Not to mention when the elements take their toll. In such circumstances, even the sturdiest decking wood can face wear and tear.
Cracks, splits, and rot can seem daunting, but when you have what it takes to repair them, you’re all good! But what if you lack the skills? Fear not, as this is what this guide is for: helping you to bring your deck back to its former glory.
In this guide, we’ll walk you through the steps to mend those weathered boards. So get ready to roll up your sleeves and let the restoration begin!
Assess the damage
Before embarking on your deck board repair journey, assess its current condition. Examine every inch of your decking timber to pinpoint areas in need of attention. Cracks, those sneaky culprits caused by expanding and contracting wood, demand your scrutiny. Splits and visible separations along the grain also warrant close examination.
However, the most insidious is rot. It’s often a result of trapped moisture that compromises a board’s integrity. Probe suspicious areas with a screwdriver; softness indicates decay.
Identifying these issues early ensures accurate repairs and prevents potential safety hazards.
Gather the necessary tools and materials
To tackle your timber decking boards repair with confidence, gather these essentials:
- Safety gear: Don safety glasses, gloves, and a dust mask for protection against debris.
- Circular saw: A circular saw facilitates precise board cutting. This tool ensures the replacement fits seamlessly.
- Pry bar: This handy tool aids in the careful removal of damaged boards.
- Measuring tape: Accurate measurements guarantee a snug fit for your replacement board.
- Replacement board: Select a high-quality, pressure-treated replacement board for durability.
- Wood preservative: Applying this solution to cut edges prevents water infiltration. Moreover, it prolongs the new board’s life.
- Screws: Use corrosion-resistant screws to attach the replacement board securely.
Step-by-Step Repair Process
Step 1: Remove the damaged board
To cut the compromised decking board, start by prying up any screws or nails attaching it to the joists. Use a pry bar, placing a piece of scrap wood against the deck’s surface to prevent gouging. Gradually work along the edges, gently lifting the board until free. This cautious approach minimises potential harm to the surrounding boards or structure.
Before proceeding, guarantee a clean slate for your repair. Sweep away debris, ensuring no remnants hinder the placement of your replacement board. A clear workspace sets the stage for a thorough and effective restoration.
Step 2: Cut and shape the replacement board
Accurate measurements are the cornerstone of a successful repair. Measure the length required for your replacement board. Use a circular saw to cut precisely along the marked lines. Shape the board’s edges, if necessary, to match the contours of adjacent boards.
Step 3: Apply wood preservative
Shield your new board against the elements by applying a wood preservative to its cut ends. This protective layer wards off moisture infiltration, extending the lifespan of your repair. Ensure even coverage to safeguard the board’s vulnerable areas.
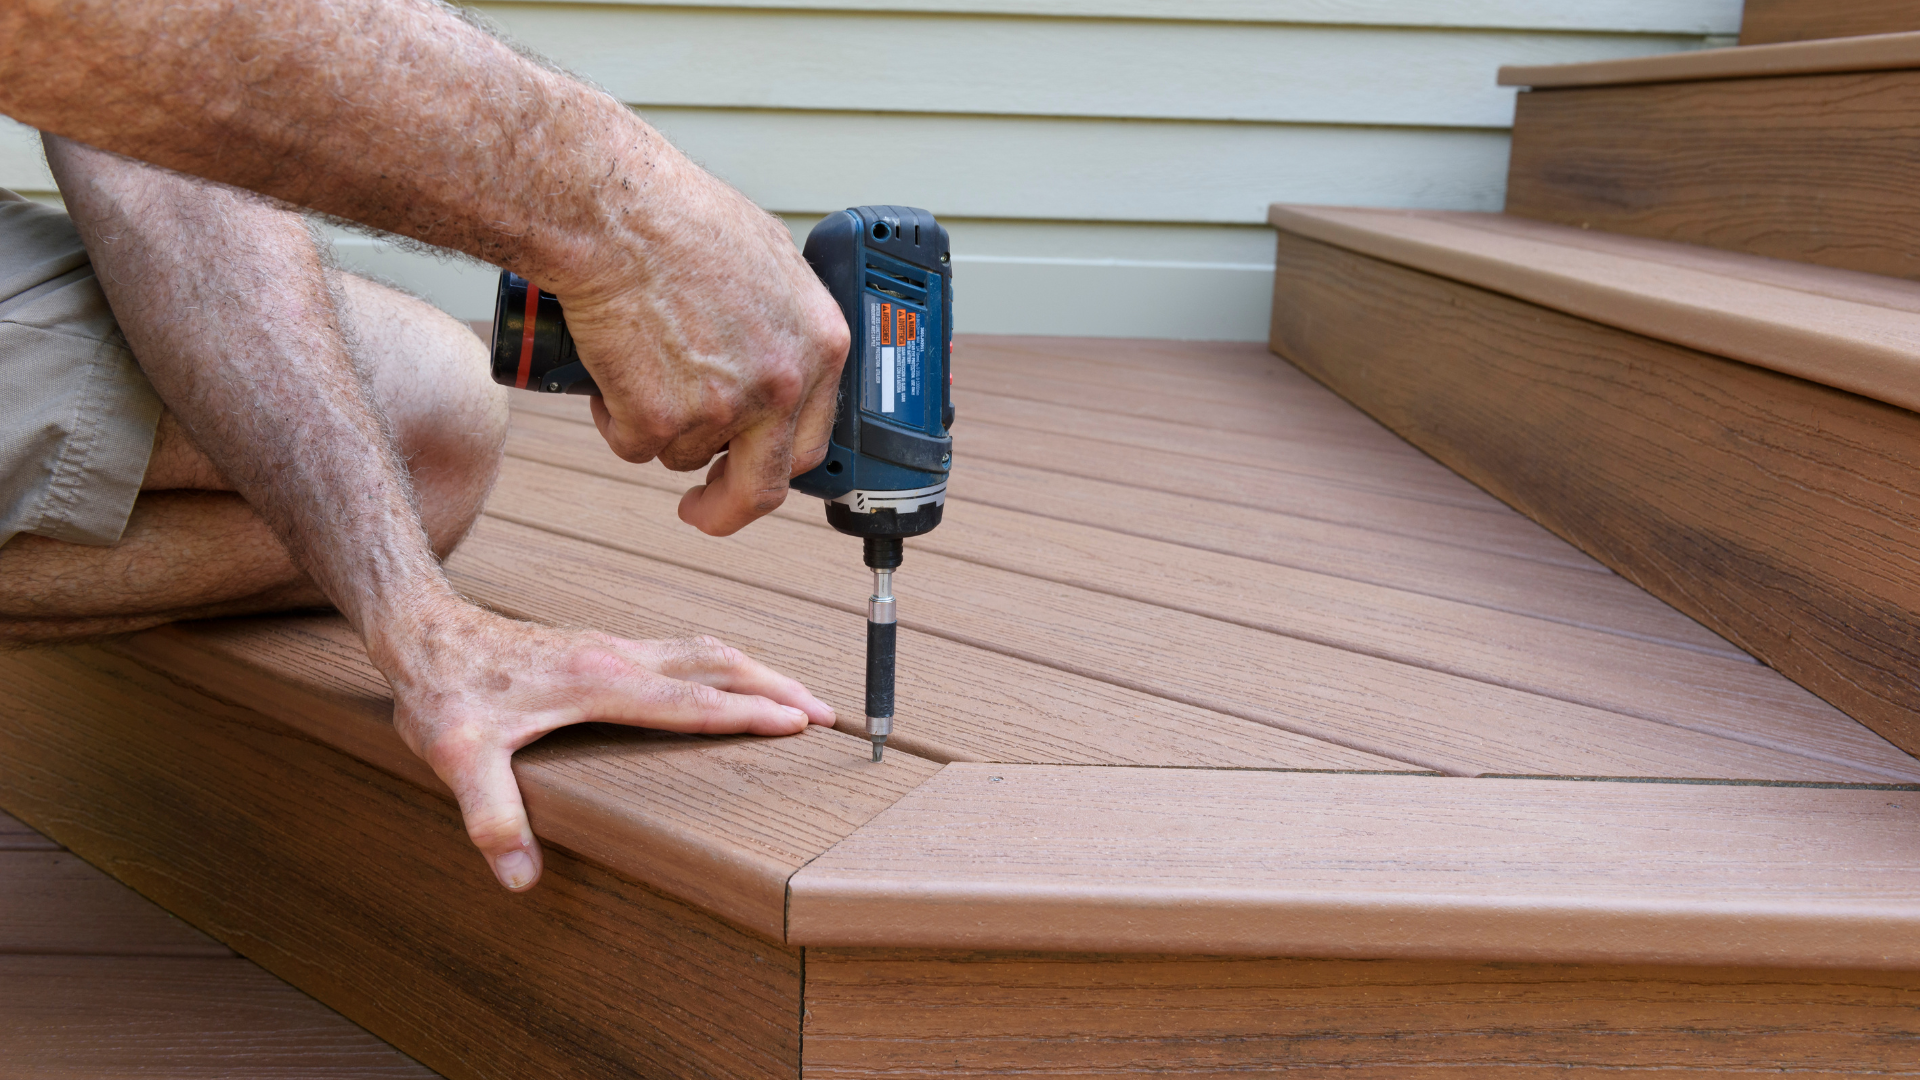
Step 4: Install the replacement wood decking boards
Position your replacement board in its designated space. Align it with neighbouring boards for a uniform appearance. Secure the board using corrosion-resistant screws. Drill them through the board’s surface and into the underlying joists. This robust attachment guarantees stability and longevity.
Step 5: Sand and finish
Smooth the repaired area to achieve a seamless integration. Gently sand the edges and surface of the replacement board. Make sure to blend it with the surrounding boards. This step not only enhances the aesthetics but also reduces the risk of splinters. Overall, it provides a safe and comfortable deck surface.
Tips for Preventing Future Damage
Safeguard your decking board wood’s longevity by embracing proactive maintenance practices. Regularly clean it to prevent dirt buildup and mould growth. A mild detergent and scrub brush works wonders.
Apply a sealant every few years to shield against moisture and UV rays. Schedule routine inspections to detect early signs of damage, such as loose boards. Swiftly address any issues to nip potential problems in the bud.
By committing to these steps, your deck will remain a haven for relaxation and enjoyment. Moreover, it’ll stand strong against the tests of time and nature.
Round-up
Armed with an inspection process and essential tools, you can address issues head-on. Remember, timely repair is key. Don’t forget the finishing touch – wood preservative and smooth sanding for a flawless finish. With regular maintenance practices, your deck will stand resilient. It will beckon you to savour outdoor moments for years to come!
Thinking of a wood decking replacement? Consider TimberX for premium outdoor timber boards! Alternatively, take a look at our softwood products or make a request for custom timber products.
What you should read next: What Can You Use Planed Wood For?